Candle making is such a fun hobby to get into, using all kinds of recycled containers (from seashells to flowerpots!) to make unique homemade candles. But how do you know what wick to use? Or how much scent to mix in? This master guide will cover everything you need to know on how to make candles at home.

I’ve been a candle-obsessed, maker-enthusiast, and DIY potion master for so many years now. Once you make one candle, you quickly become hooked.
I got so obsessed with how to make candles at home that I wrote a whole book about it. If you really want every tidbit and the nitty-gritty details about how to make your own candles, I encourage you to check out my book Make & Give Home Candle Making. It has tons of unique homemade candle ideas, too!
But let’s buckle in, because this is a juicy, tip-filled article. I cover everything you need to know about making homemade candles.
First, I’ll break down the different types of materials available, and then I’ll go into step-by-step candle-making instructions. I’ll finish off by sharing some of my candle projects to spark some inspiration.
Feel free to jump ahead to whatever section you’re interested in most below!
A Note on Safety
Remember that we’re dealing with fire here! All candles should never be burned without you in attendance. Always be prepared to extinguish a candle by covering it. Do not throw water on a burning candle, as it can cause the wax to splatter.
When adding anything into a candle other than wax, be aware that it can catch on fire. If you add herbs or other elements like glitter, colour, or even essential oils, they can react in a way that you might not expect.
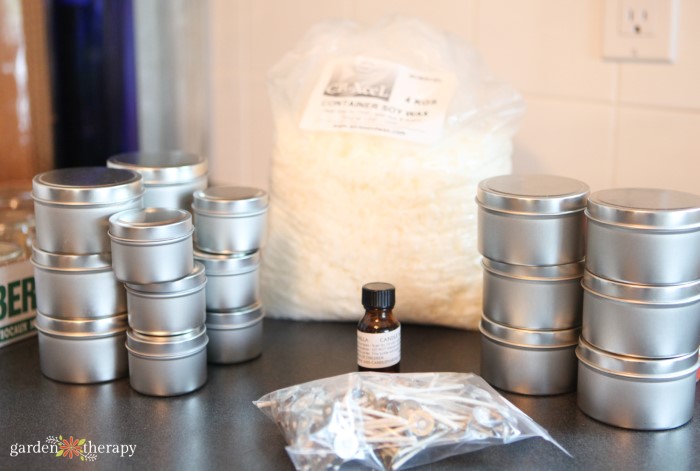
Materials for Candle Making
While candle making is fairly straightforward, each material has a few options. Read through to find the best option for you based on your desired candle and budget.
If you’re looking for samples and suggestions, check out my home candle making supply guide.
Choosing a Wax
When it comes to wax, there are three popular options for candle making: beeswax, soy, and paraffin. All are fairly easy to come across, either online or in craft and candle-making stores.
Beeswax is created by honeybees, giving it a sweet honey aroma and honey colour hue to the candles you make. It’s on the more expensive side, but often doesn’t need any fragrance added (though it pairs well with citrus and floral scents).
Soy wax is a vegetable-based wax made of hydrogenated soybean oil. It comes in a creamy white that can easily be dyed any colour. It also takes well to most fragrances. It has a lower melting point and a longer burn time than paraffin wax, but it can create dimples when the candle is burned.
Paraffin wax is a byproduct of crude oil and has been used for over 150 years to make candles. It can be a more economical choice for wax and is known for an even burn. However, it has a shorter burn time than soy wax.
You can always blend your waxes to improve wax texture, performance, and affordability. Don’t be scared to mix things up!
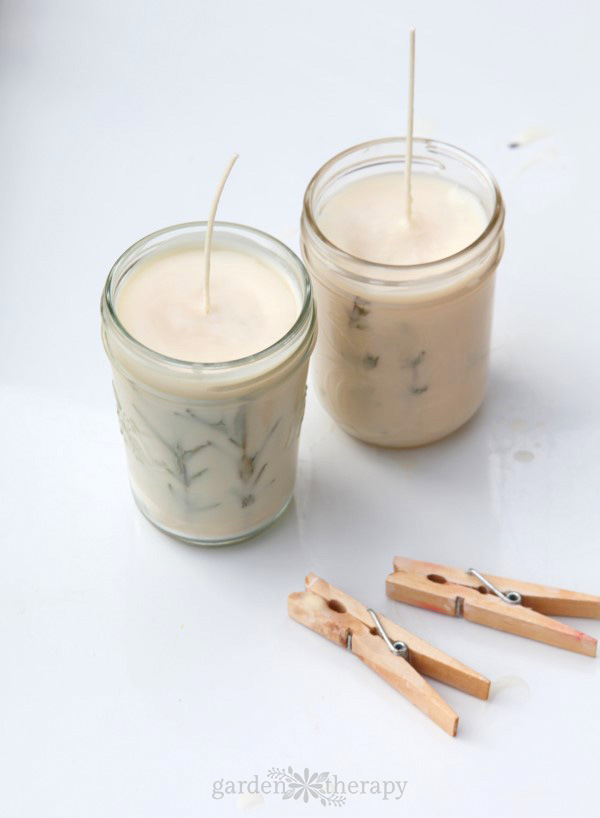
Candle Vessels
Choosing a container for your candle is one of the best ways to personalize your candle. As you can see from the pictures in this post, I’ve made candles in all kinds of containers.
Any container that is heatproof, clean, and free of cracks and holes is a goodoption. Avoid using large jars, as they require lots of wax to fill, which can get expensive and create an uneven burn once you light the candle.
Aim for containers that are pint-sized or smaller. Here are a few recycled container ideas you can try:
Candle Wicks
Wicks come in all materials and types. You don’t want to choose a wick that’s too small, or your candle won’t melt all the way to the edge. On the other hand, a wick that is too large will create lots of smoke. You want to look at the packaging of the wick to see what wax it’s appropriate for and the appropriate vessel diameter.
Here are some wick options:
- Cotton wick: comes in a large roll of string and is braided for thickness.
- Wood wick: flat wicks made from a soft wood. Make a cracking sound when burned.
- Wired wick: contains a thin zinc wire to help keep the wick straight.
- Waxed wick: contains a thin coat of wax. Use a paraffin-coated wick for paraffin wax and a soy-coated wick for both soy and beeswax.
- Tabs: metal tabs to hold and weigh the wick down at the bottom of the container (often glued in place).
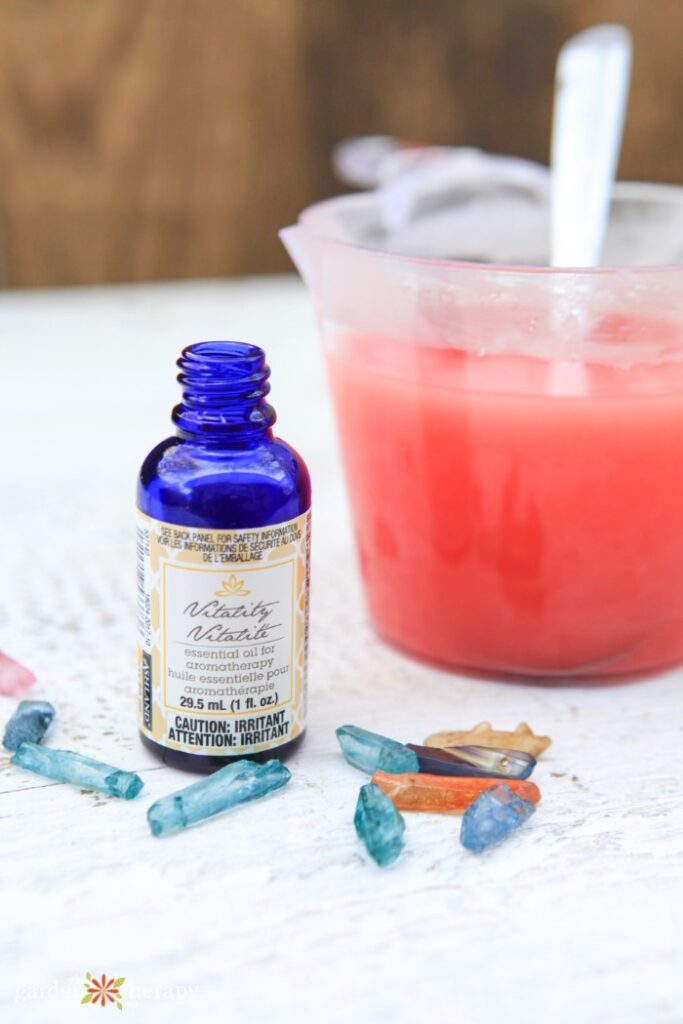
Artificial Fragrance vs Essential Oils
Personally, I rely only on essential oils for my candles. I find artificial fragrances irritating, especially in candle form when they are designed to scent the whole room. That being said, I’ll tell you the pros and cons of both fragrance and essential oils.
Fragrance oils are the most consistent. They are designed to handle the hot temperatures of a lit candle without evaporating, and come in a wide variety of lab-created scents you just won’t find in an essential oil.
Essential oils are natural scents extracted from plants. They’re sometimes better suited for people with scent sensitivities or allergies. Essential oils are common in aromatherapy thanks to their healing effects. In candles, they aren’t as consistent in fragrance as some will evaporate at the high temperatures of candles.
Pro Tip: hot throw refers to the scent the candle gives off when it’s burned, while cold throw refers to the candle’s scent when unlit.
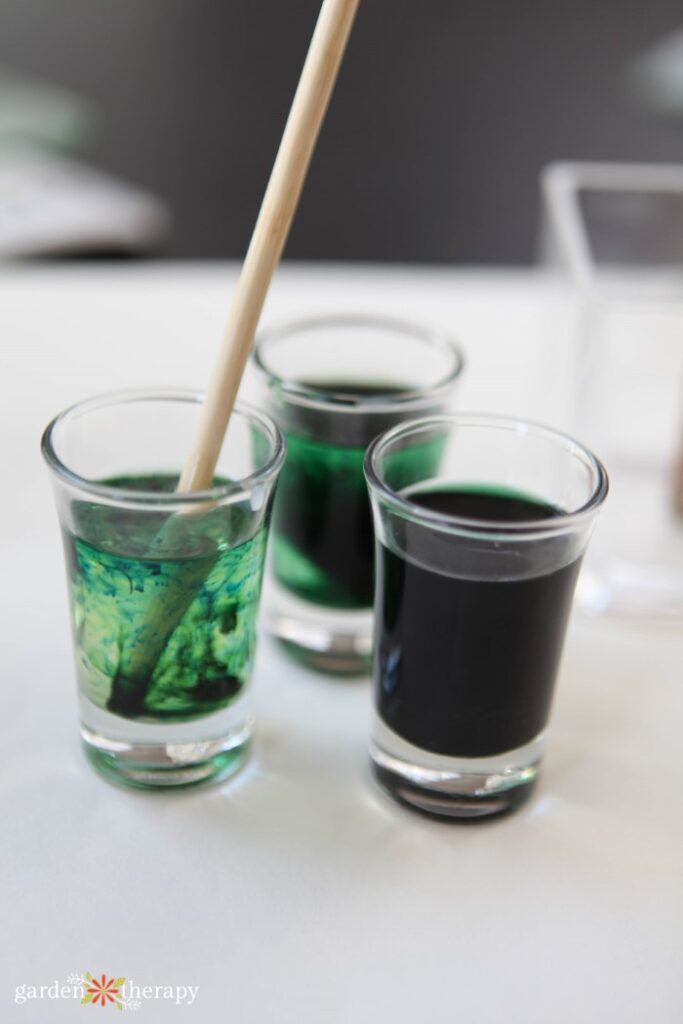
Colouring Candles
Another great way to personalize your candle is by adding colour. I love making ombre candles by layering different colours of wax. You can use liquid wax dye and solid wax dye, both designed for colouring candles.
I also like to use crayons because they’re super inexpensive. However, they can give a slight crayon smell and can clog a wick. To avoid this, use them in a very small amount.
Decorative Elements to Add Candles
You can add all kinds of specialty items to your candles, as long as you do it safely. I go into much more detail in this post on how to properly add botanicals to your candles.
All in all, remember that you’re dealing with fire here. You don’t want to include anything large and flammable. Keep elements like dried flowers to the edges. I like incorporating pressed flowers along the glass where they are decorative but well away from the wick and fire.
Another creative way to decorate is with wax itself. You can make shapes out of beeswax sheets (like in this flower candle).
You can also buy moulds with all kinds of shapes that you can use to fill with wax and then decorate the top of your candles with. I particularly like these succulent ones, this seashell mould, this flower one, and this fall-themed set.
Wrapping Candles
The final touch on a candle is to wrap it up. If you’re gifting your candle, you definitely don’t want to skip this step!
Here are some wrapping suggestions:
How to Make Candles At Home: Step-by-Step
Now onto the candle making! Once you have all your supplies and materials sorted out, the actual candle-making process isn’t difficult.
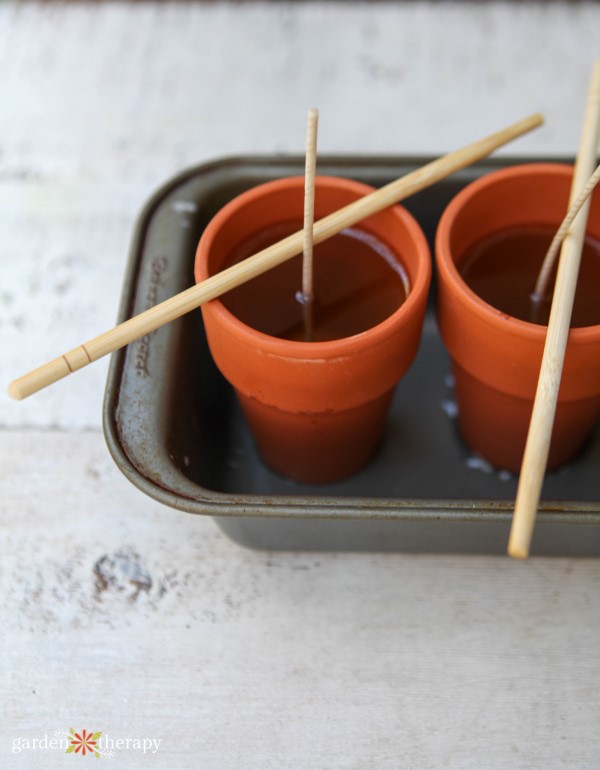
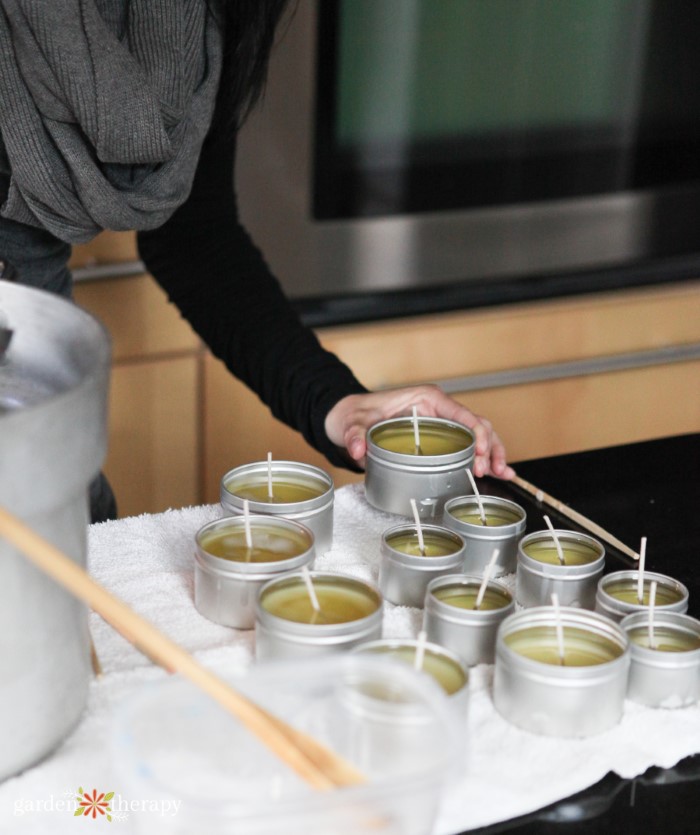
Start by preparing your wick. Assemble your wick of choice by placing it in a tab (if it isn’t already in one). Make sure it sits flat on the bottom of the container.
Add a dab of hot glue or a wax adhesive to firmly attach the wick tab to the bottom of the container. Use a pencil or pen with a lid if you can’t get your fingers to the bottom of the container.
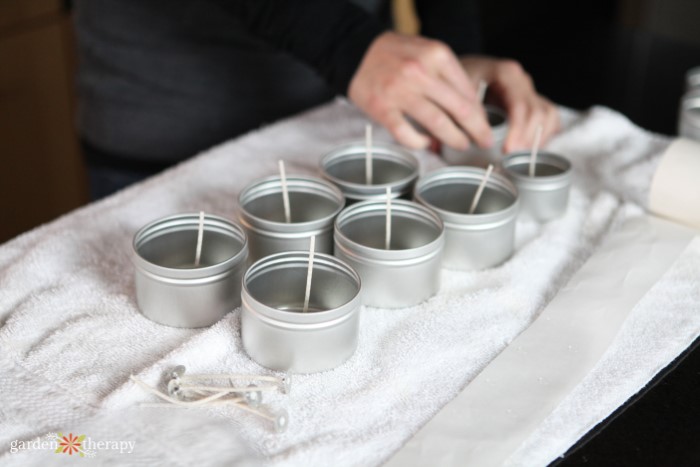
Use a chopstick or clothespin to help keep the wick upright and straight.
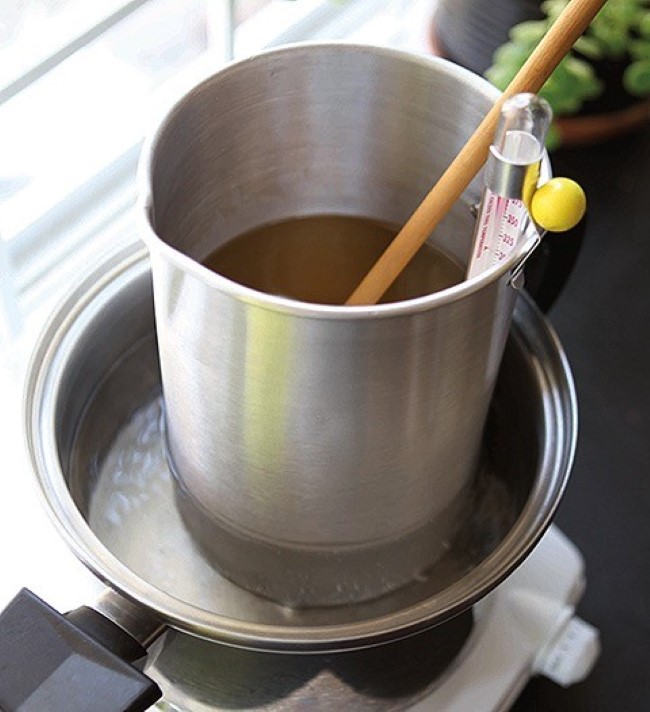
Prepare your double boiler. I like to use a container with a pour spout to make pouring my wax as easy as possible. If you make homemade candles often enough, I suggest investing in a candle pouring pitcher.
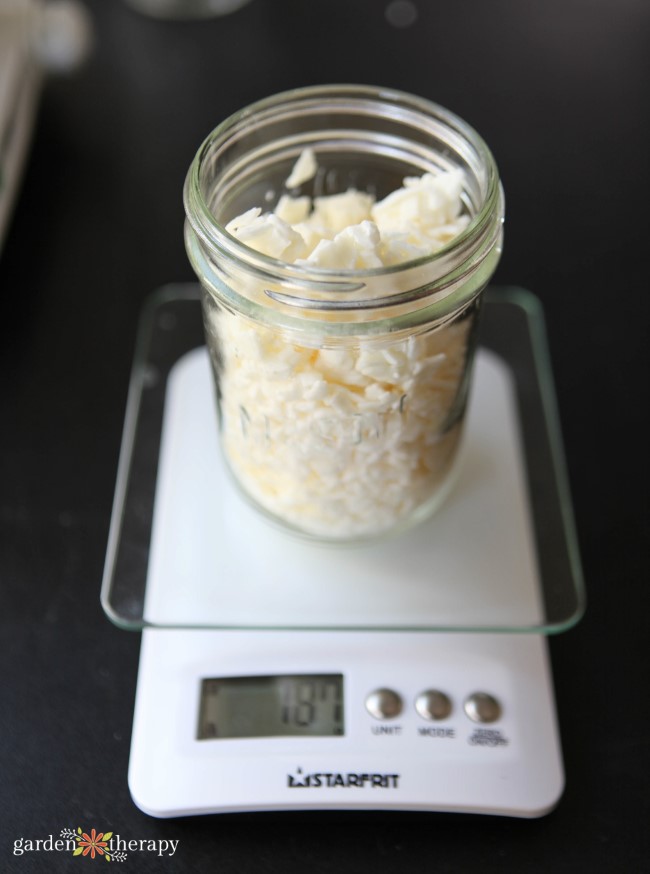
If working with wax blocks, cut them up into smaller pieces to help them melt faster.
Weigh the amount of wax needed on a scale, followed by the fragrance or essential oils.
Heat the wax over medium heat until the wax is melted and reaches the appropriate temperature designated on the packaging of the wax you purchased.
If you’re adding colour and scent, the wax needs to be heated higher than you will pour the candle. It will differ depending on what type of wax you’re using since they all have different melting points. So refer to your wax’s packaging for the temperature.
Let the wax cool to 140°F and pour the wax into the container.
Wrap your candle in a towel and let it cool down, and set it completely untouched in a warm room.
After 24 hours, trim your wick to 1/8” to ¼”. And it’s ready to be burned!
Unique Homemade Candle Ideas
I’ve made MANY candles over the years. Here are a handful of the candles I’ve made for indoor, outdoor, and Christmas use. Find detailed tips and tutorials for each candle by clicking the project link!
Indoor Candle Projects
Outdoor Candle Projects
Christmas and Holiday Candles
Homemade Candles Troubleshooting
Fragrance load is how much scent oil the wax will hold. A common fragrance load for soy wax is one ounce of scent oil per one pound of wax, or a 6.25% ratio.
You can increase or decrease the ratio depending on how strong the scent is. Use 8-10% for a subtly fragrant oil and 6-8% for a strongly scented one.
Fragrance oils will always smell stronger than essential oils, since they are designed to handle the higher temperatures when lit. Essential oils can evaporate when they reach a certain temperature, leaving the cooled-down candle nearly scentless. So, while they may have a nice cold throw (scent when unlit), they may lose the hot throw (scent when lit).
If you want to stick with natural essential oils, choose strong, notable scents such as eucalyptus, sweet orange, lemon, and cinnamon.
Make sure you add the fragrance at a higher temperature so that it properly bonds to the wax and is evenly distributed. The temperature varies depending on the wax, so read the packaging for the exact temperature. For soy wax, it’s typically around 160°F.
A depressed center can occur from the wax cooling too quickly or varying wax temperature. If you get a depressed area around the wick when cooled, warm up some more wax and pour a thin layer on top of the candle to smooth out the surface. You can also smooth out the top using a low-temperature heat gun (do not use a blow dryer, as it melts and splatters the wax).
Some brands of soy wax can create dimples when it’s burned. If this happens, consider using a different brand or a soy wax blend.
Cracks in the candle can happen if the wax was cooled too quickly or left in a cold room.
And that just about covers it all! If you have any more questions about how to make your own candles, leave them in the comments below, and I’ll get back to you as soon as I’m able!
A city girl who learned to garden and it changed everything. Author, artist, Master Gardener. Better living through plants.