
Happy Friday GPODers!
We’re back in Richmond, British Columbia today to continue Cherry Ong’s series on her small garden renovation and greenhouse installation. In Part 1 (click the link if you missed it last week), we got an introduction on the project as well as a little backstory on the garden that needed to be removed for the greenhouse to be built. We’re picking up where we left off, with the removal of that beautiful perennial garden, and the preparation and construction of the greenhouse base.
Tree and Plant Removal
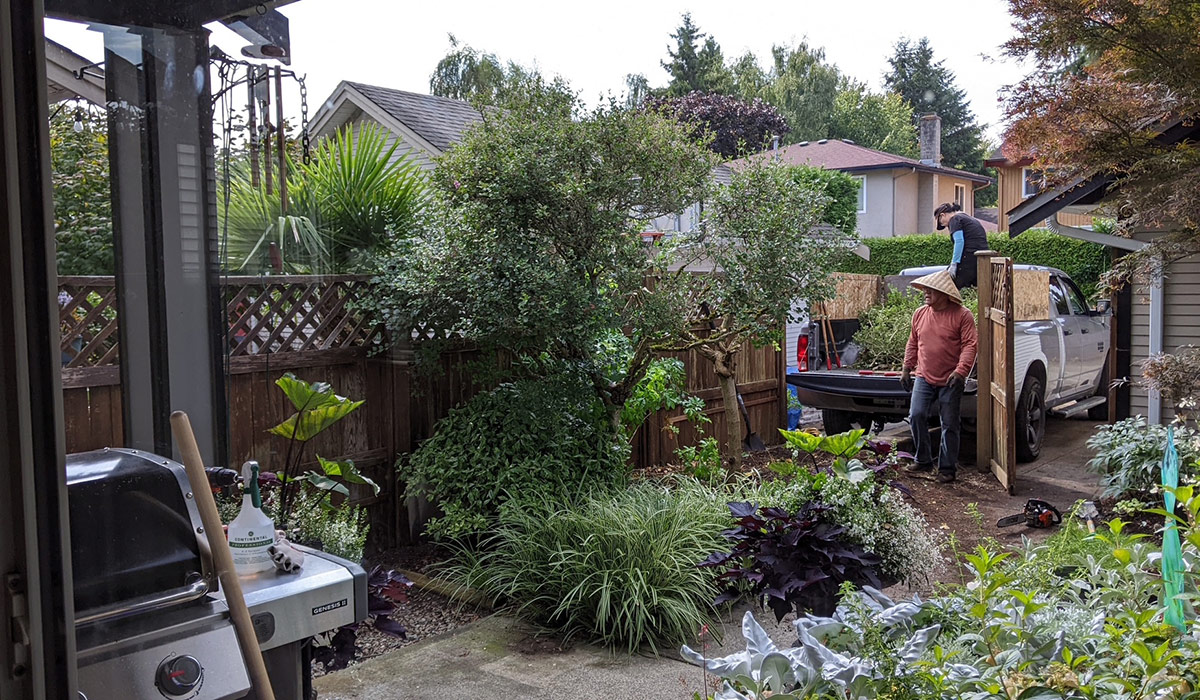
Along the same time that our fence was being replaced, we hired professionals to remove lilac trees and other perennials in the bed. It took them half a day and cost us around $6 a square foot. The service included hauling out the specimens and debris but not the removal of the soil.
Photos 1-5 show plant removal, disposal and clean up by the contractor and his crew.
 It’s never easy to say goodbye to one plant, much less a whole garden bed. However, sometimes sacrifices must be made for new growth and opportunities.
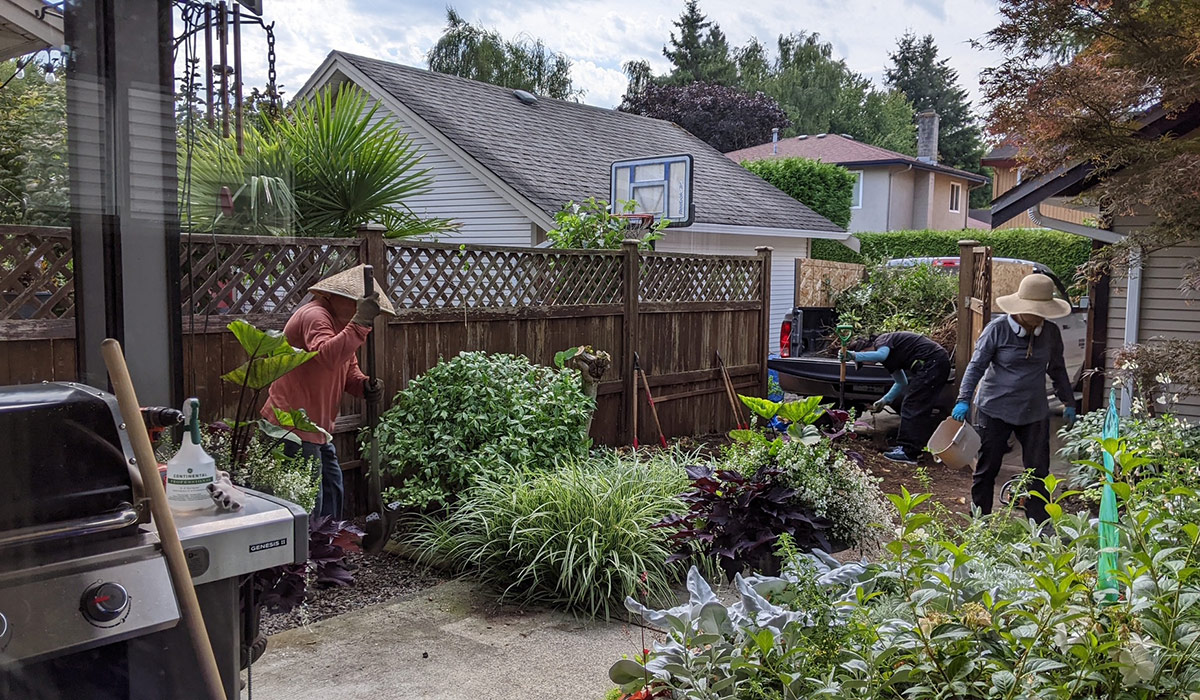 When battling hard-to-remove plants like trees and mature shrubs, sometimes calling in the professionals is the best option (if it’s available to you). This is particularly helpful in a small space like Cherry’s, to ensure you don’t hurt yourself or surrounding plants.
 I can imagine it is also a little less upsetting than having to pull those beautiful plants from the ground yourself!
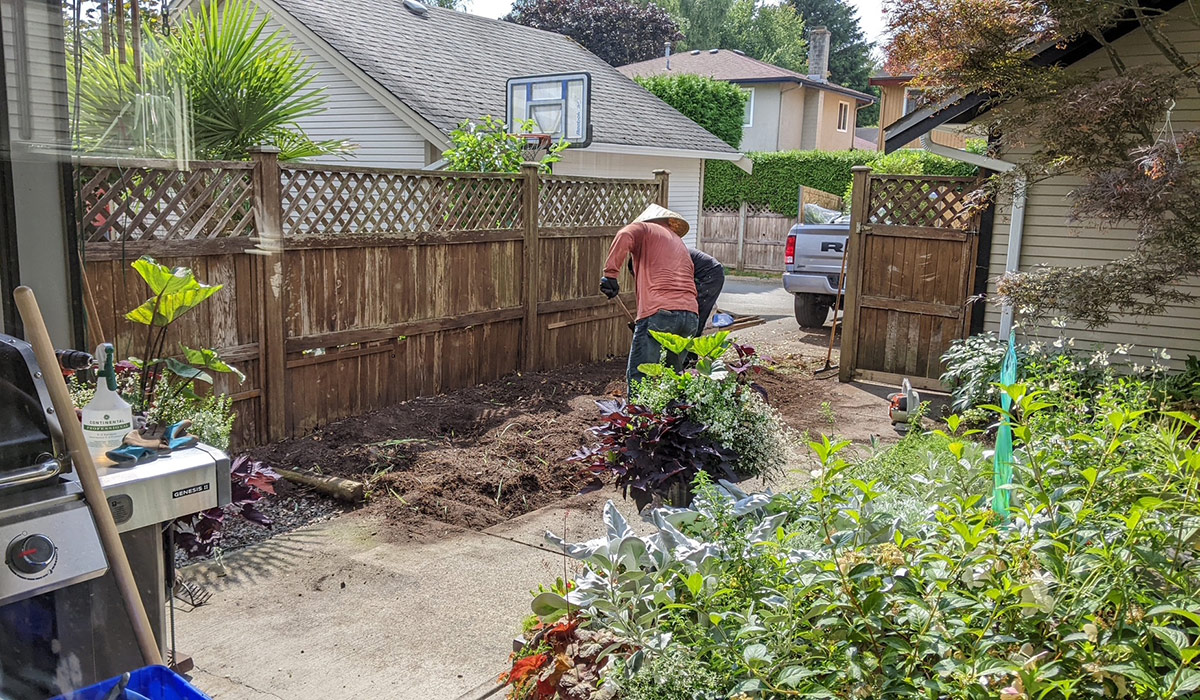
 And just like that, in half of a day, the bed is cleared and a blank slate remains. While it’s sad to say goodbye, the excitement for what is to come must really hit at this point.
Greenhouse Base
Russell Nursery (@russellnursery) provided detailed and helpful advise on site preparation and foundation construction of the greenhouse base: hallsgreenhousesbc.com/foundations/. I was previously concerned about the size of the greenhouse and the base extending to the walkway but I was told this is not an issue structure wise.
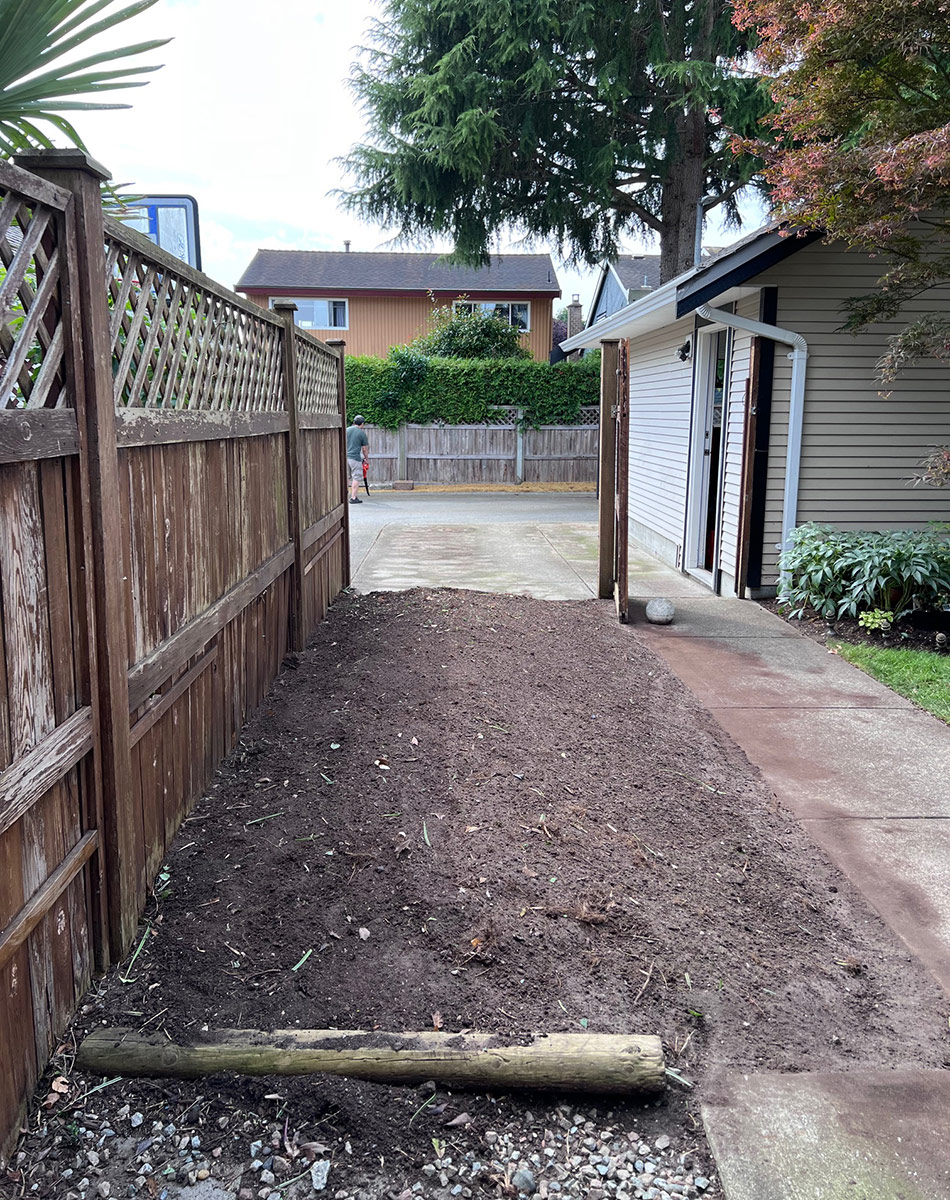
One thing we failed to anticipate budget wise was the high cost of the greenhouse base preparation for such a small space. We had quotes that reached up to $80 a square foot for soil removal and gravel placement. Most of the contractors wanted to bring in a small bobcat which jacked up the price of the removal. Our fence contractor was eager to complete the job and he found a subcontractor who performed the service without machinery. They completed the task in 2-3 hours. (Prior to that we removed almost half of the soil.) We took care of soil disposal.
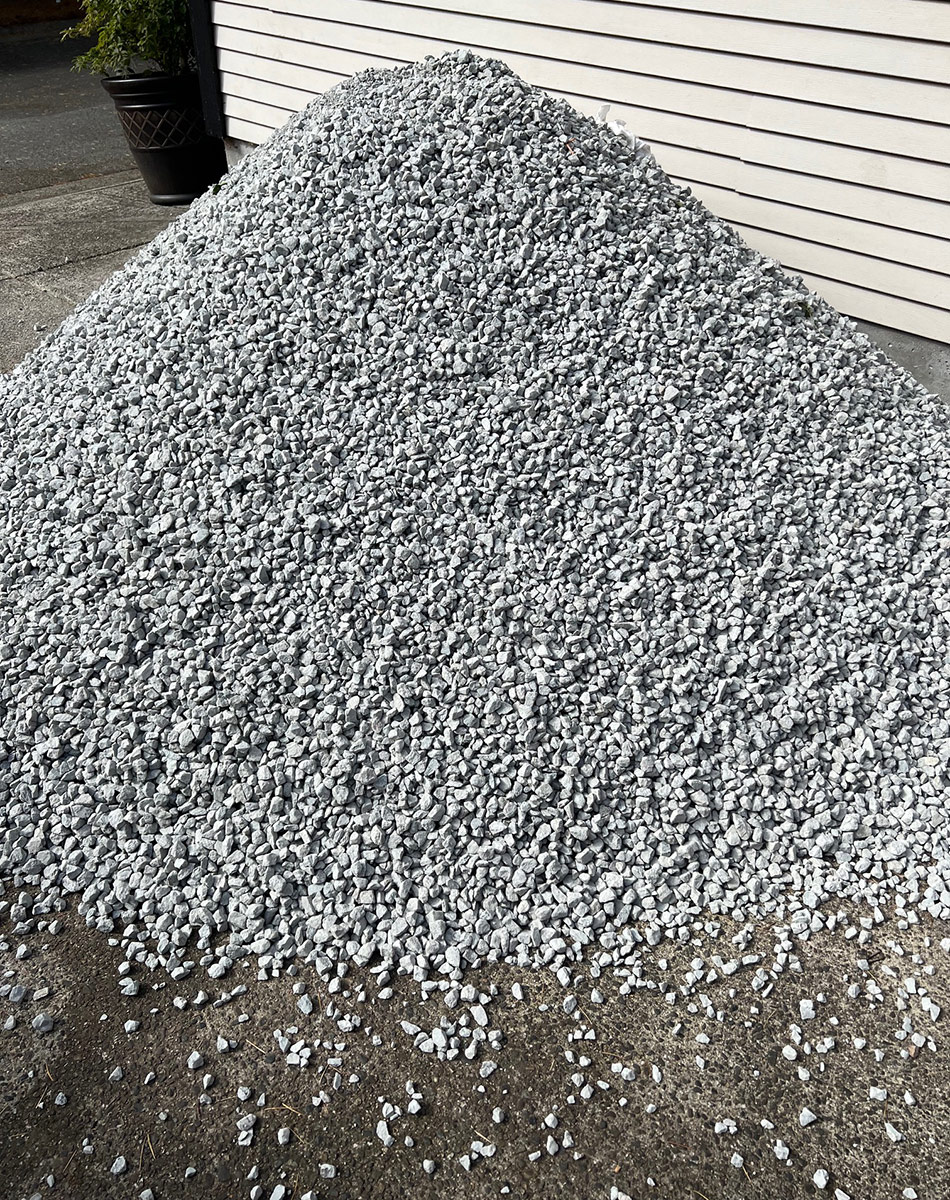 We used 1/2 inch clear crushed rock (drain rock) for the foundation pad. We preferred 3/4 inch but it wasn’t available.
 Looks like it passed inspection!
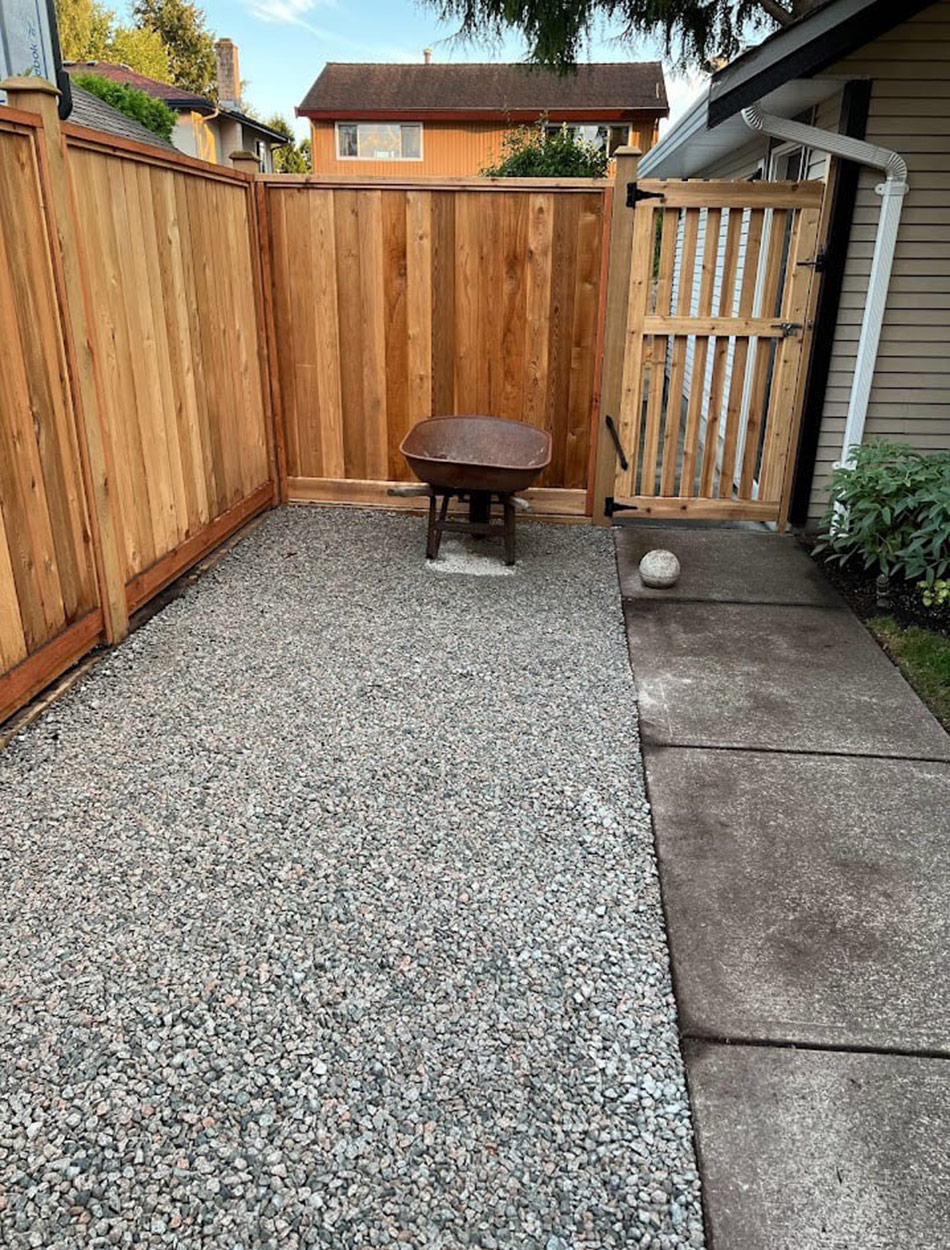 6 inches of crushed rock in the future greenhouse pad. Landscape fabric was placed before the gravel was added.
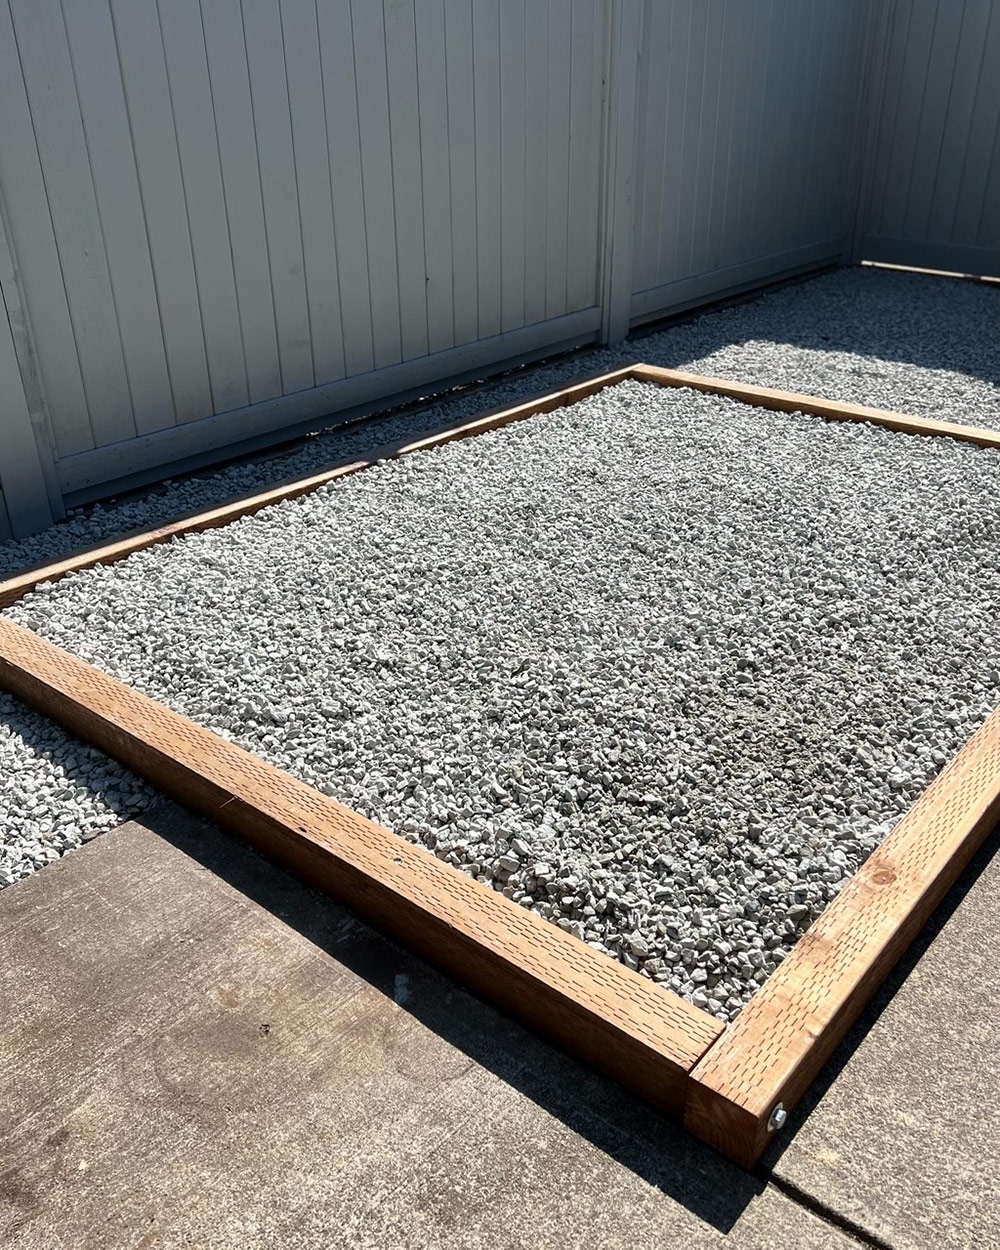 Foundation is constructed of 4 x 4 pressure treated lumber held together with galvanized 6” by 1/2” lag bolts with washers. The pressure treated lumber is nestled into the bed of crushed rock but the tops must be higher than the finished grade. It was filled with more clear crushed rock. Very very important that the foundation is level and square!
Since our garden is quite small, we were not able to allow for 18 inches of space on the east side of the greenhouse. Typically the pad of the greenhouse should be 18 inches or larger on all side than the greenhouse so that you can easily walk around the greenhouse to clean and maintain it.
Greenhouse Selection
For the greenhouse, after shopping around, I fell in love with a UK-made Halls Greenhouse at Russell Nursery in North Saanich, BC. The model we chose is a Supreme 8’ x 6’ which features a dark green painted aluminum frame, a single sliding door, roof vent, clear glass glaze with the curved sides paneled with 4.5 mm polycarbonate. The COVID pandemic affected the glass supply chain for our greenhouse so we waited 2 years. Nathan from Russell Nursery was wonderful in educating and supporting us before, during and after our build.
The photos below show various greenhouses and accessories on display at Russell Nursery. I was really interested in efficient storage so I also looked at various plant stands for greenhouses. I have received many questions about the plant stands on social so I thought including shopping photos would help show your readers what is available and possible.
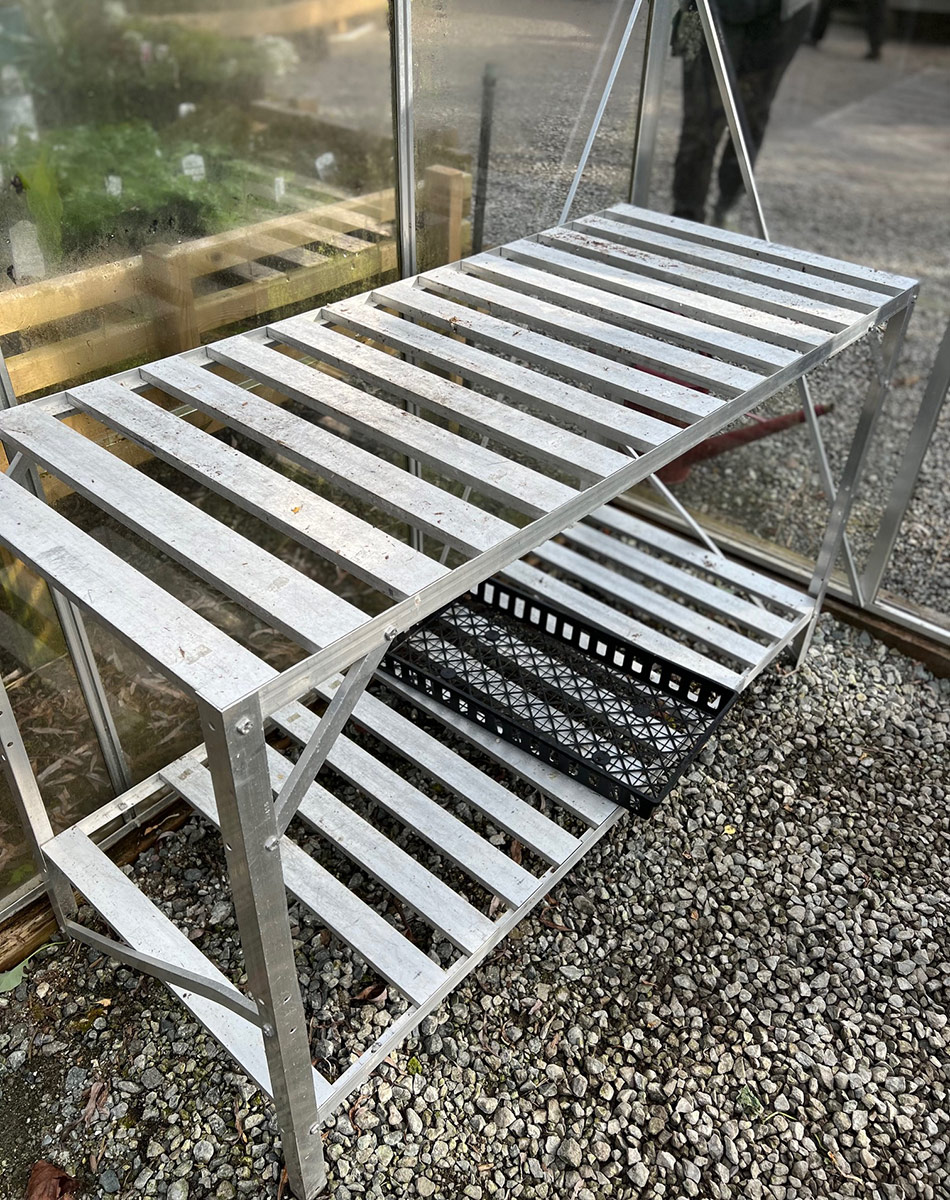 The plant stand many have asked me about…
 Potting table extension on the top – I don’t know any avid gardener who wouldn’t want to extra space!
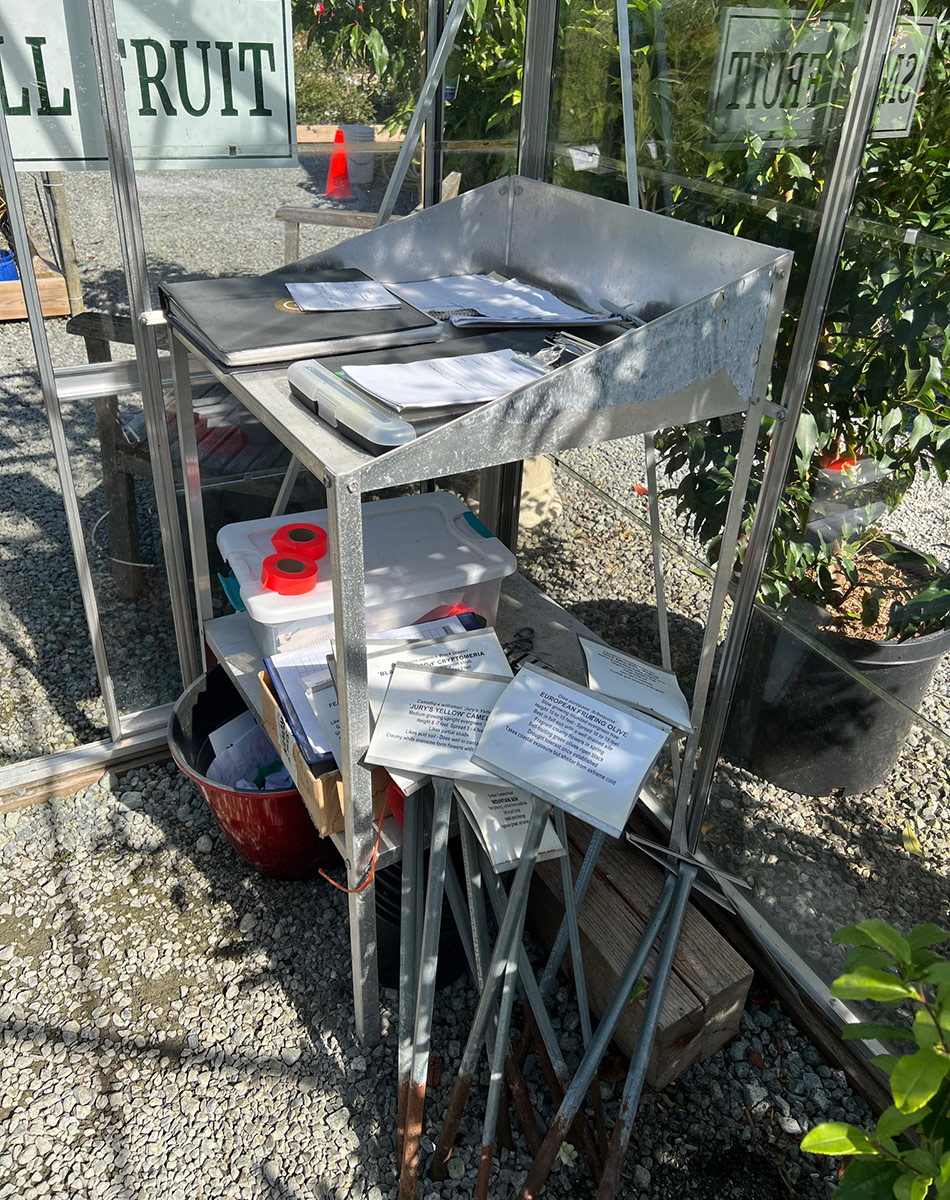 Moreover, any avid gardener would also appreciate a dedicated potting table inside or outside the greenhouse!
More to come! Thank you.
Thank you, Cherry! I couldn’t think of a better series to get the creative juices flowing for spring projects. Next week we will cover the greenhouse assembly, so if you’re thinking about adding a greenhouse to your garden this year be sure to stay tuned for Part 3.
And if you have any major garden projects you’d like to share with the blog, we’d love to see and hear about the garden dreams that you made a reality. Follow the directions below to submit photos via email, or send me a DM on Instagram: @agirlherdogandtheroad.
Have a garden you’d like to share?
Have photos to share? We’d love to see your garden, a particular collection of plants you love, or a wonderful garden you had the chance to visit!
To submit, send 5-10 photos to [email protected] along with some information about the plants in the pictures and where you took the photos. We’d love to hear where you are located, how long you’ve been gardening, successes you are proud of, failures you learned from, hopes for the future, favorite plants, or funny stories from your garden.
Have a mobile phone? Tag your photos on Facebook, Instagram or Twitter with #FineGardening!
Do you receive the GPOD by email yet? Sign up here.
Fine Gardening Recommended Products
Bee Watering Station with Vivid Flower Design
Fine Gardening receives a commission for items purchased through links on this site, including Amazon Associates and other affiliate advertising programs.
Thoughtful Combo: You will receive a bee feeder and 30 glass marbles. This thoughtful combo can provide clean water for the bees, you just need to put the marbles into the bee watering station, add water (note: the water level should not exceed the height of the marbles) and hang them in the right place. The round, colored marbles can provide a place for the bees to stand and prevent them from falling into the water, effectively keeping the bees safe. Fine Material: This exquisite bee bath is made of high quality iron material, smooth surface, rust and weather resistant, not easy to fade, sturdy and reliable. Bee cups for garden can well meet the drinking water needs of lovely bees, and it can also provide food for bees, such as sugar water, nectar, etc., attracting more bees to your outdoor area and making your garden full of vitality. Perfect Size: The butterfly watering station has an overall height of 13.4 inches, a bowl diameter of 9.4 inches, and a weight of 0.44 pounds. The bee cup serves the needs of the bees well without plunging them into dangerously deep water or taking up unnecessary space in your garden, and this compact and efficient design makes it a practical addition to any outdoor space. Elegant Design: Our bee watering cups are designed in unique flower shapes with vibrant and realistic colours to attract lovely bees to your garden and patio, bee feeders for outside are not only functional but can also be used as a landscaping element, their vibrant floral patterns enhance the beauty of your garden. Multicolored Decoration: Colorful bee water stations look like flowers in a garden, flower bed or pot and attract bees and butterflies. They can drink or bathe in bee feeders, which are highly decorative and practical.
Attracting Beneficial Bugs to Your Garden, Revised and Updated Second Edition: A Natural Approach to Pest Control
Fine Gardening receives a commission for items purchased through links on this site, including Amazon Associates and other affiliate advertising programs.
This revised and updated edition of Jessica Walliser’s award-winning Attracting Beneficial Bugs to Your Garden offers a valuable and science-backed plan for bringing balance back to the garden. With this indispensable gardening reference—now updated with new research, insights, and voices—learn how to create a healthy, balanced, and diverse garden capable of supporting a hard-working crew of beneficial pest-eating insects and eliminate the need for synthetic chemical pesticides.
The Crevice Garden: How to make the perfect home for plants from rocky places
Fine Gardening receives a commission for items purchased through links on this site, including Amazon Associates and other affiliate advertising programs.
A crevice garden replicates the environmental conditions of mountain tops, deserts, coastlines, and other exposed or rocky places on earth. These striking garden features provide perfect conditions for the plants native to these far-off places, bringing the cultivation of these precious gems within everybody’s reach.


